Quick summary. Moneris Checkout needs a Store ID, API Token, and Checkout ID from the Moneris merchant portal. Direct API / eSELECTplus keys alone are not enough—see the Direct Canada guide for that integration.
Moneris Checkout Prerequisites
- You must have a Moneris Checkout Gateway Merchant Account
- You need the Store ID, which you use to log into the Moneris Gateway Merchant Account.
- You will need an API Token and Checkout ID, which can be generated by following the below guide.
Setup Guide
You need to obtain an API token inside the merchant account. Go to My Account and click on ADMIN. Then click on Store Settings and the button to generate an API Token.


Once you get your API Token, you need to create a Checkout ID. To generate the same, click on Admin and select Moneris Checkout Config.
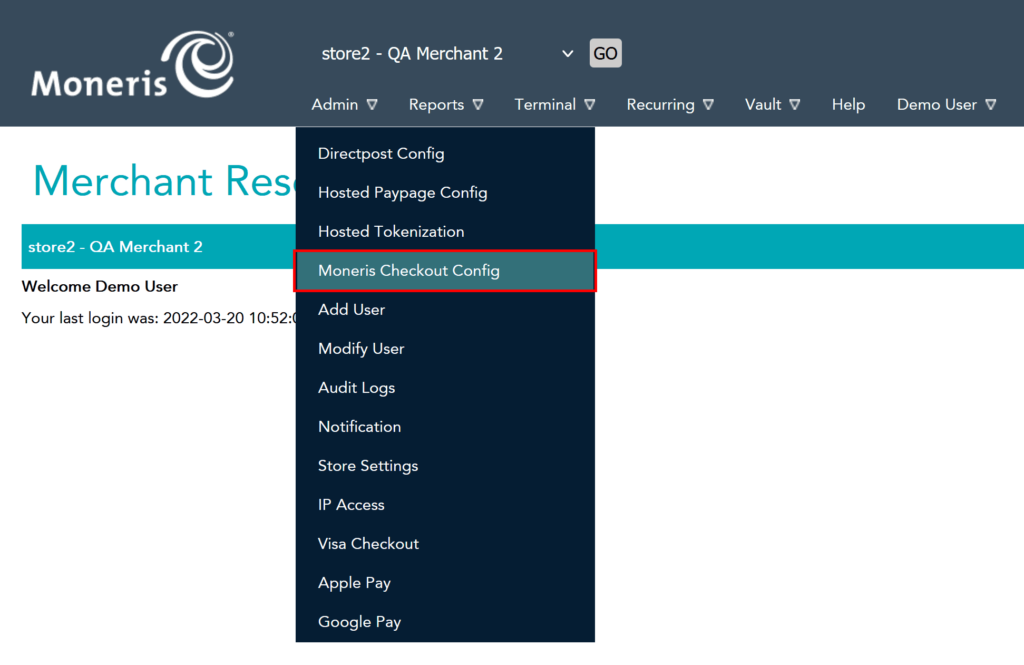
Once you are at the Moneris Checkout Configuration Page you need to Create a New Profile.
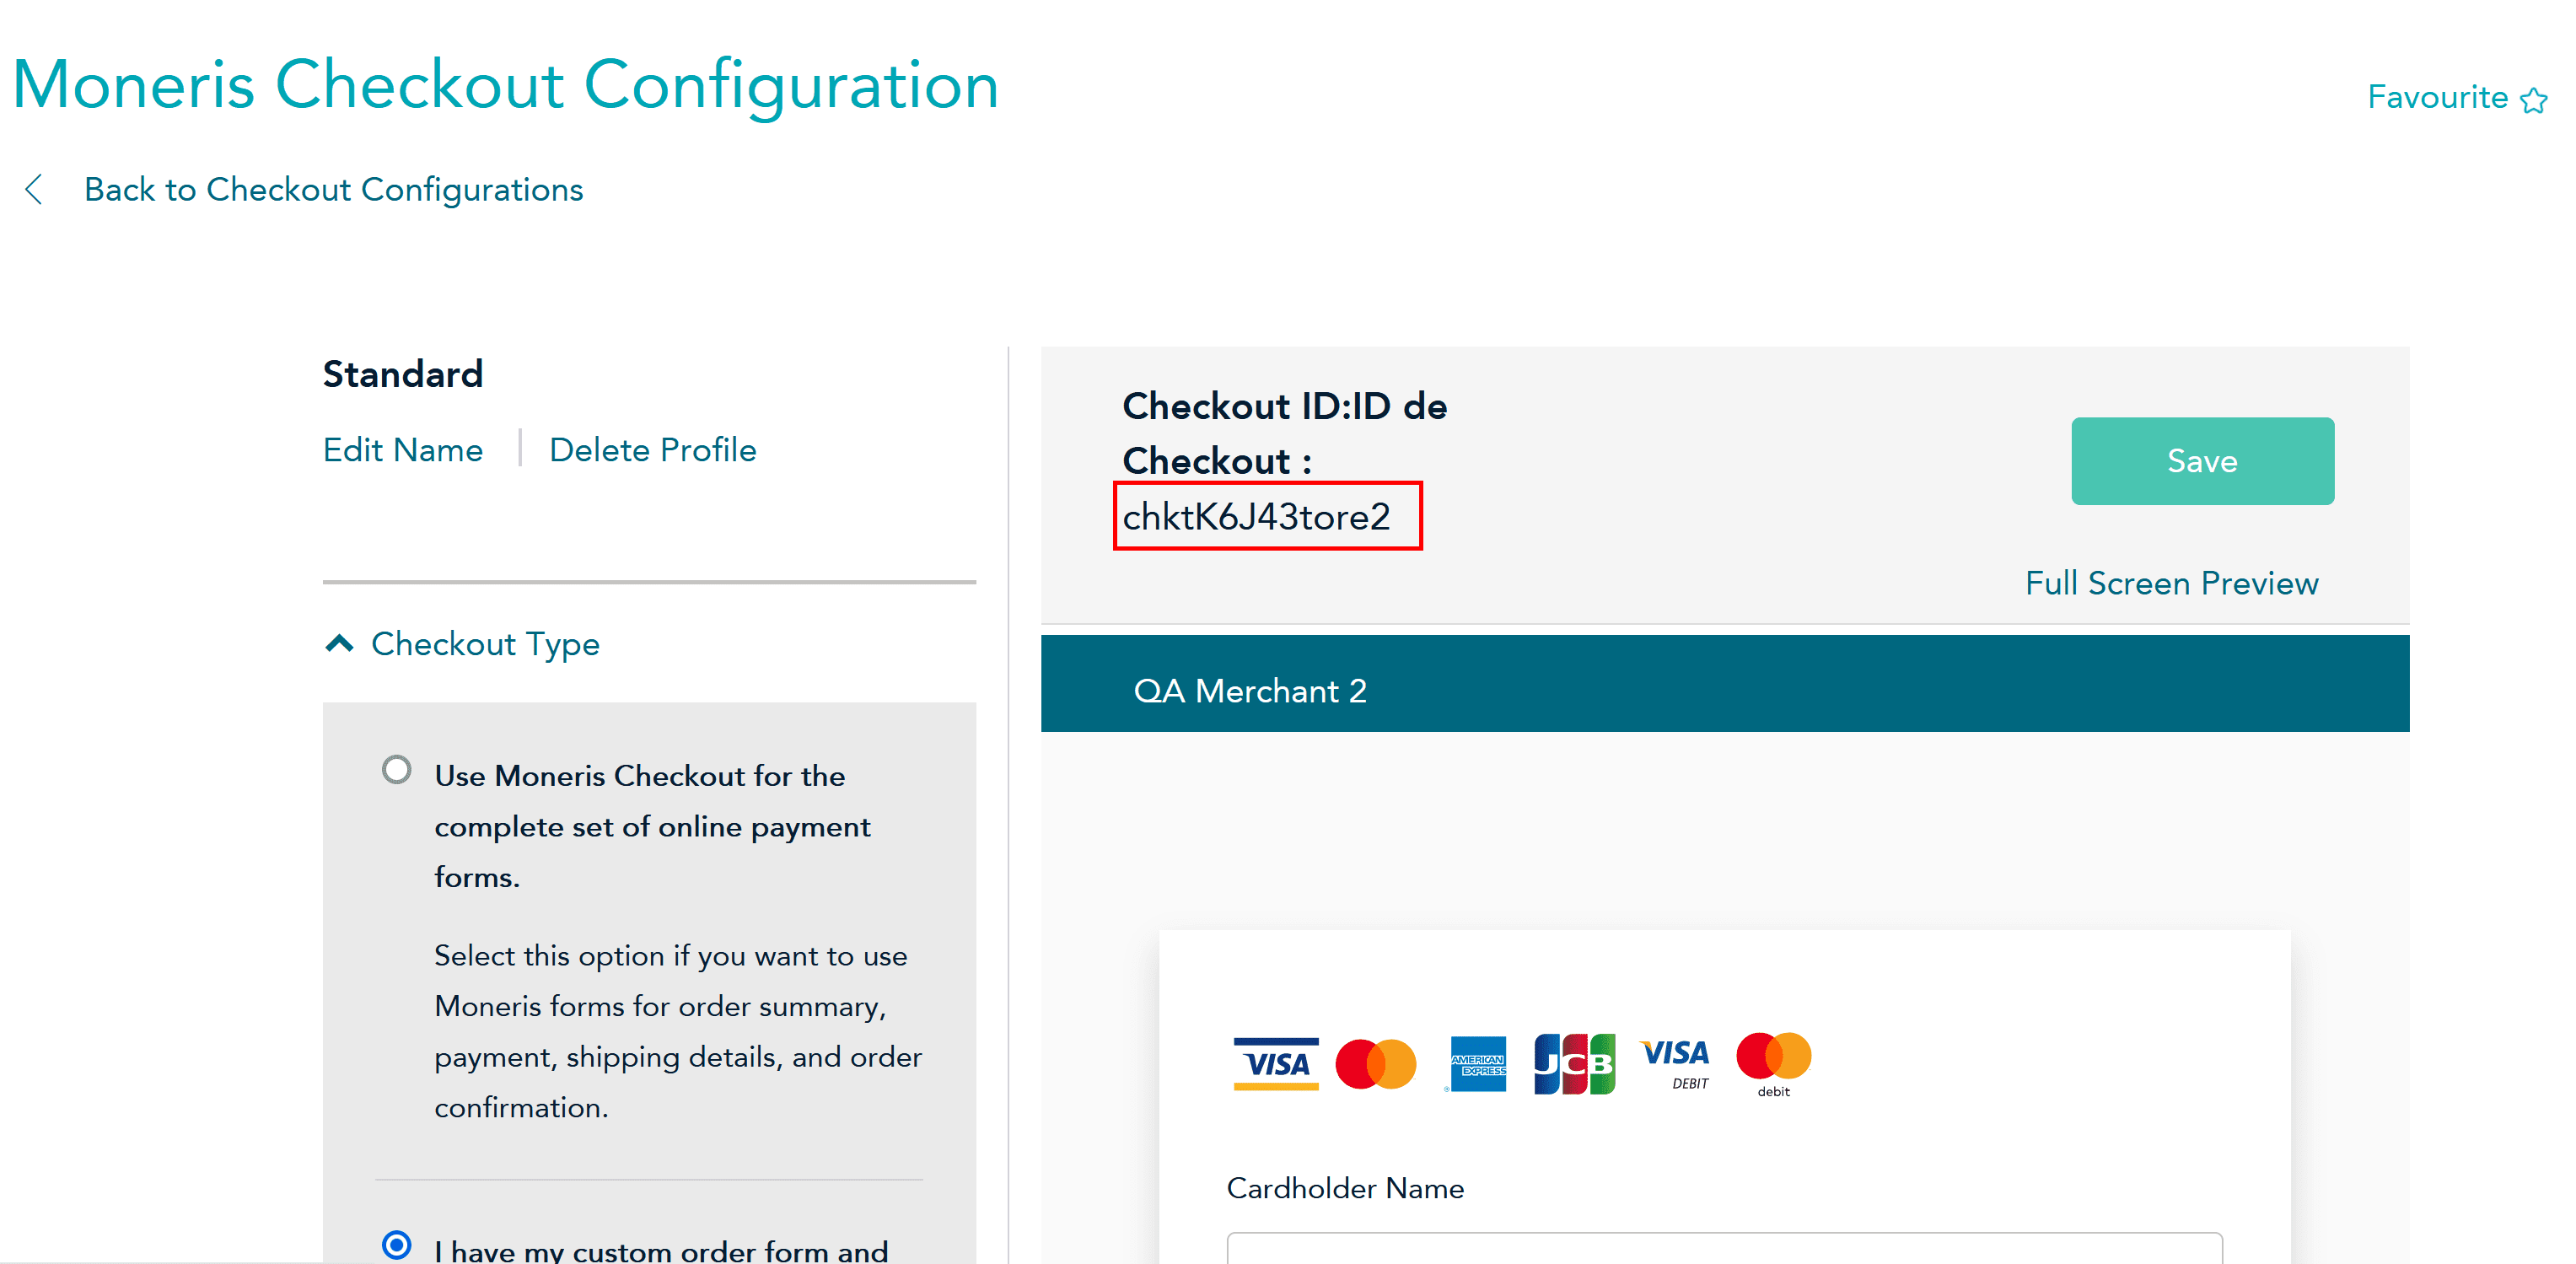
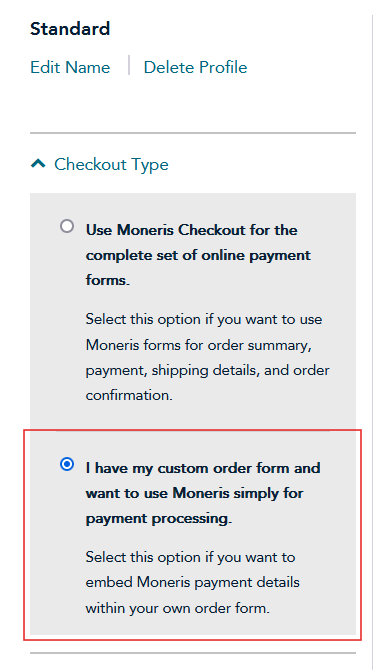
On this page you find your Checkout ID. Next you need to select Checkout Type as “I have my custom order form and want to use Moneris simply for payment processing.” to make make sure plugin is able to accept payments.
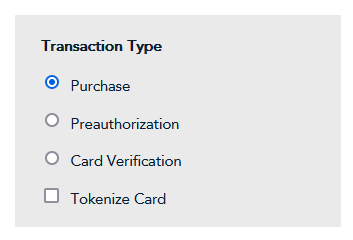
Now under Payment Section find Transaction Type and make sure Purchase is selected.
That’s it you have setup the Moneris Checkout to accept payments.
Install
Install Moneris Checkout Gateway for WooCommerce on staging. Do not put Checkout ID into the Direct CA plugin.
Config / sandbox / going live
Paste Store ID, API Token, and Checkout ID in the Checkout gateway settings. Run a sandbox purchase in the hosted Checkout window, then switch to the live Checkout profile and repeat one low-value live charge plus refund.
Common problems
Wrong Checkout ID, mixing Direct and Checkout credentials, or a WAF blocking the Moneris return URL. Timeout or unknown status: reconcile before retry.
Related guides
Product
Moneris Checkout Gateway for WooCommerce. Custom or headless: custom integration.